Thursday, March 12, 2015

Bye ?


Well, as much fun as this was ^~^ It's time to say good bye! There were so many ideas I had O.0 never really got to them though ^_^ O well ! I learned how to use Photoshop and take pictures, I learned how to use the correct setting at the appropriate time and well yes :D this .. yeah that was all O.0 bye ? maybe ... idk 0.0 This is kind of sad, but just think about puppies , bunnies and glitter ! byeeee <3

Explaining the setting used in Photoshop

Here is just going to be a list of all the setting that I have learned how to use in Photoshop these few past weeks that we have been learning about photography.
Burn ; This makes things darker, you can use it to either darken eyebrows / hair / eye lashes or make shadows more dominant of if you are making fake shadows if you have Photoshopped a pineapple onto the beach and want a more realistic feel.
dodge; this tool is what I used to brighten or lighten things like eyes and teeth you can find it under the same category as burn.
liquefy; at the top of the bar you'll find a tab called filter and there is where you'll find liquefy, remember to have the right size brush or else you won't see much result. You can use this to either shrunk or enlarge or move around the picture.
healing spot tool brush; this looks like a band aid and you can find it on the side bar. It's used to take about for example a wound or zit or even mole.
clone stamp ; this looks like an old fashioned stamp, once you select this setting you have to hover over the spot that you want to use as your stamp and than click alt click and walla ! You have now a stamp to do as you please with.
gradient map; on the top bar you click image and find the adjustments than proceed until you find gradient map. You can use this to change the color tones on the photo that you are working with as I have done black and white or even colored and others.
quick selection tool ; When I made the micro-humans I used this to select the human and copy it. it selects certain part of the photo that you are working on and either move them around or rescale them de-c

olor and much more it can be found on the side bar and it looks like a paint brush.
transform found on the top bar under edit than transform, you can use this to do things like re-scale things and rotate the picture.
refine edge ; this is to soften the contour of whatever part of the image you selected you can use feather and smooth. you find it on the top bar as well under select , refine edge.

Photoshop editing

From helping a graduate student get rid of an unfortunate zit, to masking the beautiful flaws that make humans to who they are. Photoshop can be used for so much even silly cute things like placing a loved one in the toilet :) There are many setting that you can use, but since I'm a new beginner to the whole editing photo business, I just use simple settings. The ones I learned how to use are dodge, burn, spot healing brush tool, clone stamp and liquefy. I also learned how to do things like make a picture black and white or purple and blue.
 Here is the after picture that I edited, since this young lady is so stunningly beautiful I didn't want to change anything really, but to demonstrate how Photoshop works I used the sot healing brush tool to take away a few bumps on her face the dodge tool to brighten her eyes and slightly brighten her smile I also used the burn tool to make her eyebrows more defined, this is a natural edited photo.  
Now this is what I would call extreme editing and manipulation, I am not a fan of changing the way someone looks, even if it simply is a zit or a blemish , because that imperfection has a story behind it. For this photo I enhanced the settings from the photo from above and added clone stamp and liquefy to the settings that I used. I shrunk her nose widen her eyes and cloned stamped her eyeball to make a fancy decor under her eyebrow and i clone stamped parts of her smile to extend that breath taking smile of hers, she kind of reminds me of a sea creature now, like a hybrid between shark and jellyfish. I shrunk her arms and hands and her chest and took away all of her moles and also used healing spot brush tool to make her skin look more even toned.

Wednesday, March 11, 2015

Black and white


I used the gradient maps method to achieve the black and white tones , before I applied the black and white felt i selected the lips so that it would not be colored.

8 photos

This picture falls under the category Light

The sun is a radiant light source gracing the rest of the sky with its rays creating a gentle lustrous orange light through out the entire picture and closes to the sun the picture gets lucent. The idea behind this picture is that I love the heavens and the natural painting that are created by it, this sunset was amazing and alluring as are all. the sun is mid center low to the bottom as to not over whelm the picture and it is evened out to create an even better landscape picture.


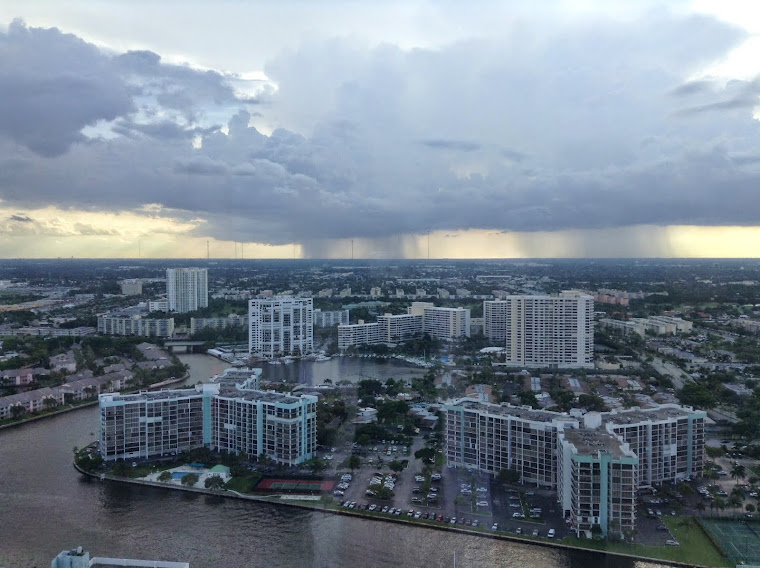
 This photo falls under the category water
This picture was taken from behind a glass window so the picture may have some unclear specks, but I think that makes it special and tells a story that even though I'm so close to the water I can't be swept away by it. The water has a powerful blue color which is my favorite color ^~^ The water seems solid and slight rolling motions giving the picture a pretense of movement.


This is a photo I took of Ellen-Marie, it's a portrait picture from a mostly side view with her upper body facing forward and a solid background that blends in with the colors of her clothes and causes a camouflage effect. She is looking away from the camera as thought she is hiding and waiting for something to happen, her eyes are intense and focused on something far away as well as lost in her own thoughts, perhaps she is the one that is hunting someone down? She is in the center of the picture because she is the main focus. 


This is my favorite picture ! These hands show so much emotion, which a lot of hands do but for me these show something akin to an anxious calmness. The lighting is coming from the upper right corner casting the other hand that is in main focus in shadows and defining it more.
  This photo falls under the category valgfritt tema. 


This photo falls under the category light / landscape( valgfritt tema)
I like this photo because the light brings out the beautiful green color and it makes the world like a perfect farming country picture.


I moved my mirrors so that I could get different angles of the same thing all at once showing that a photographer for news reporters often want to show a story from more than one point of view. One story can have many different descriptions all from where you are standing. I used the landscape mode for this picture because it gave me the best colors according to the light and it gave the photo more depth 


This photo falls under the category valgfritt tema


This sky painting has clouds that seem to be flowing and creating a soft blanket to hide the strength and harness of the sun. The clouds are creating a dappled effect having spots of light stronger at certain points. The sun is aglow emitting light from within the cavern of the clouds. The only light source is the sun and because it is being devoured by the sky the rest of the picture is cast into a darkness creating a stark contrast between the sky and mountains.


This photo falls under the category light

the light for this one is coming from an artifice light in the fridge from the canteen downstairs, I set the focus point on the front of the latte cup showing that that is what is important. The light creates a glowing atmosphere and blurred the background away from the focus point.


This photo falls under the category valgfritt tema

photo studio

Whilst working in a photo studio there is a list of things that you have to control which in itself can both be a blessing and a hindrance at the same time. Underneath is a list of things that you would have to control helping you to get the best lighting and pictures, unless you like natural light more, which in my case I do favor it more.


Lamper:


1: Hovedlys, Softbox, Lysstyrke 9, ISO 100, t60, f-8
2: Utfyllingslys, Softbox, Lysstyrke 8, ISO 100, t60, f-5,6
3: Utbrenningslys, Paraply, Lysstyrke 8
4: Utbrenningslys, Paraply, Lysstyrke 8
Kamera:
ISO: 100
Lukkertid: t60
Blenderåpning: f-8


this is a group photo simply cropped


 me and Ellen-M i cropped and brightened our eyes and shadowed slightly.